Game Interface
Complete guide for client features and first-time setup
Client Download and Installation

- First, download the game client from this page
- Once the client is downloaded, extract the files and run the installer. Follow the on-screen instructions to complete the installation process.
- After installation, start the client launcher (padlauncher_vX.X.X.X) and let it download the available updates until you read "✅ Client is up to date"
- Select your preferred language using the settings (cog) button located at the top-right side of the laungher
- The launcher will present you with the available client options at the bottom-right side of the screen, for example: OGL and Dx9. Choose any of them to start the client.
- Finally, use your credentials to acccess the game. The next section will guide you through the account and character creation process.
1. How to create an account
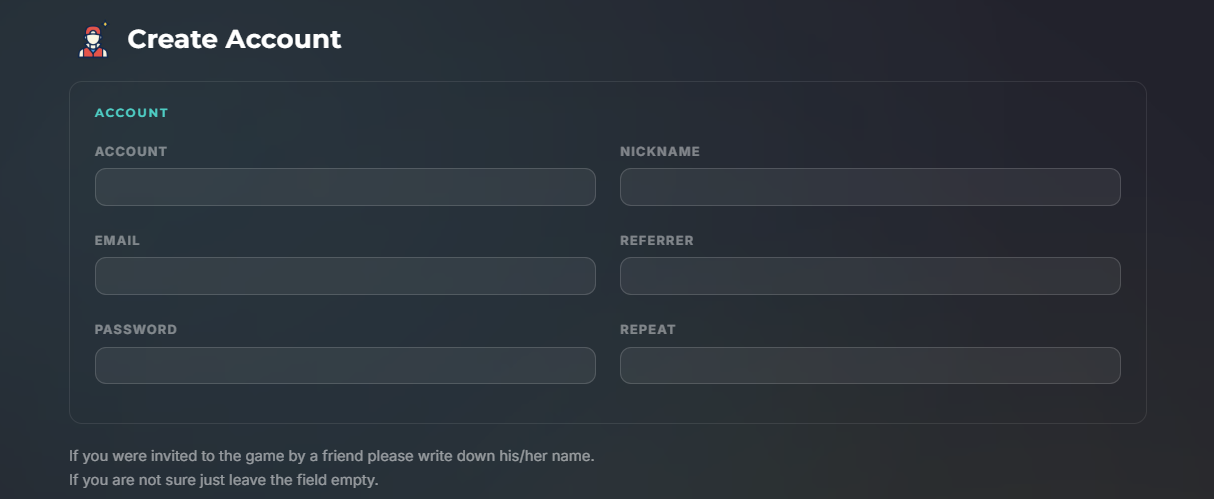
Go to this page to create your account with your basic information.
- Account: Your login used to enter the game
- Email: Use a valid email for account recovery
- Nickname: This is just an internal nickname for your account, not relevant to access the game
- Password: Set a strong password and then confirm it again in the Repeat field
- Referrer: Optional character name from a friend
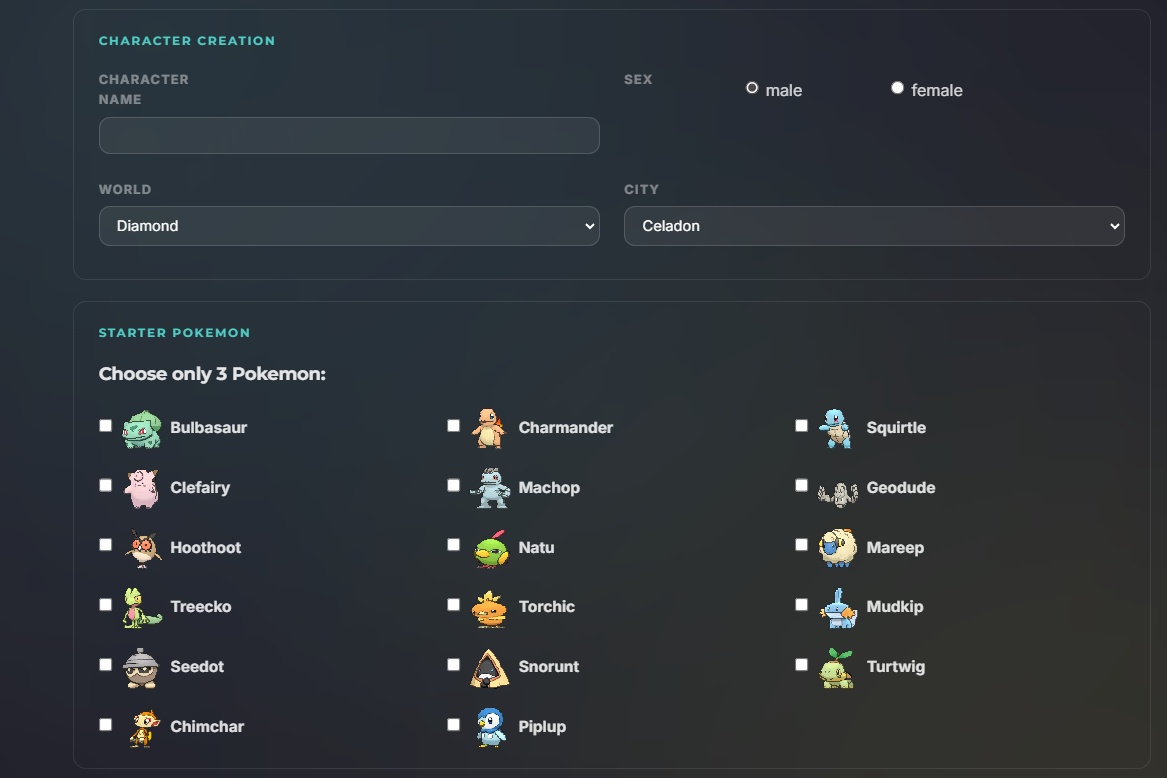
For character creation, fill in the required fields and select your preferences:
- Character Name: Name of your new character (You can change this later using diamonds)
- Sex: Male or female (You can change this later using diamonds)
- World: Select Diamond or Platinum (You cannot change world once your character is created)
- City: Starting city (You can change residency this later in-game for free)
- Pokemon: Choose your first three companions in this adventure
Finally, complete the captcha challenge and click the "Register" button. You can then log in to the game with your new account.
2. First login
After installing the client, use your account and password to log in
- Account name: Your Account
- Password: Your password
- Remember password: Saves your credentials locally
- Auto login: Skips manual confirmation
- Use proxy server: Optional connection route, you can see available options from the dropdown below
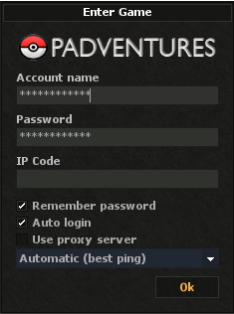
If you try to login without an account and password, it opens TV mode for available streams
3. Client configuration and in-game client
After you log into the game, you will notice two menus on the top of the screen, one positioned to the left and the other positioned to the right side.
As you progress in the game, you will gain a better understanding of their purpose but we'll provide an overview here.
Menu on the left side:
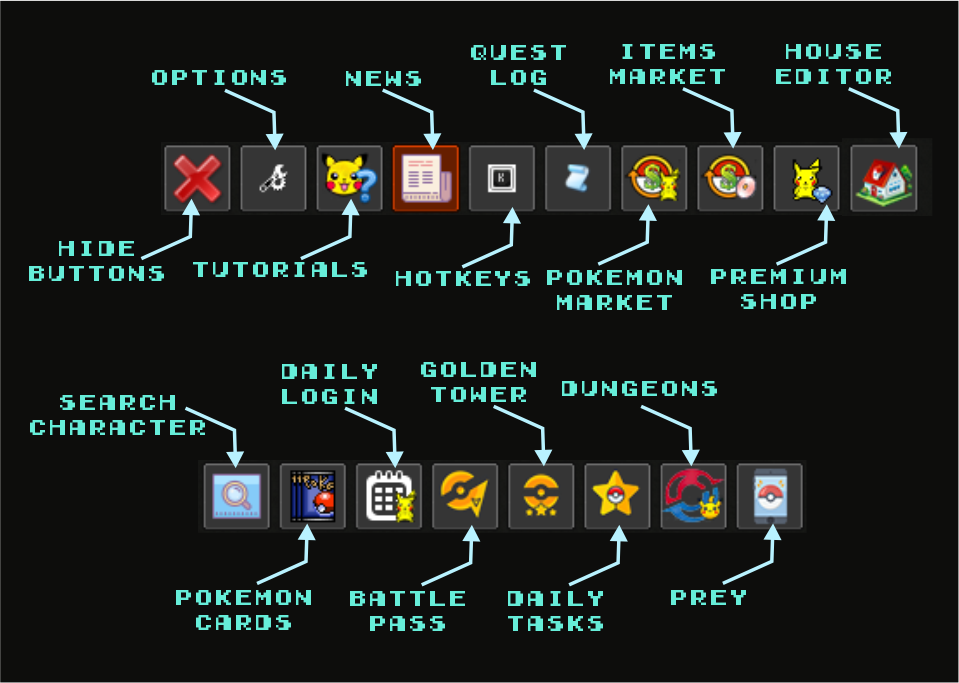
- Hide buttons: Hides the buttons from the left top menu
- Options: Opens settings like: Game, Console, Graphics, Audio and more
- Tutorials: Opens the in-game tutorial system
- News: Displays the latest game news and updates
- Hotkeys: Opens the hotkeys configuration window
- Quest Log: Opens the quest log to track your progress
- Pokemon Market: Access the Pokemon market interface
- Item Market: Access the Item market interface
- Premium Shop: Access premium stuff like outfits, battle passes, boosts and other items purchased using diamonds
- House Editor: Logs out your character and returns to the login screen
- Search Character: Allows you to search for other players in the game and see some of their statistics
- Pokemon Cards: Opens the Pokemon cards interface where you can view and manage your card collection
- Daily Login: Opens the daily login rewards interface where you can claim your rewards for logging in each day
- Battle Pass: Opens the battle pass interface where you can view and claim your battle pass rewards when active and the related tasks
- Golden Tower: Opens the Golden Tower modal where you can see your progress on this dungeon feature
- Daily Tasks: Opens the daily tasks interface where you can view and manage your current tasks
- Dungeons: Opens the dungeons interface where you can view and participate in various dungeon challenges
- Prey: Opens the prey interface where you can view and manage your current prey targets
Menu on the right side:
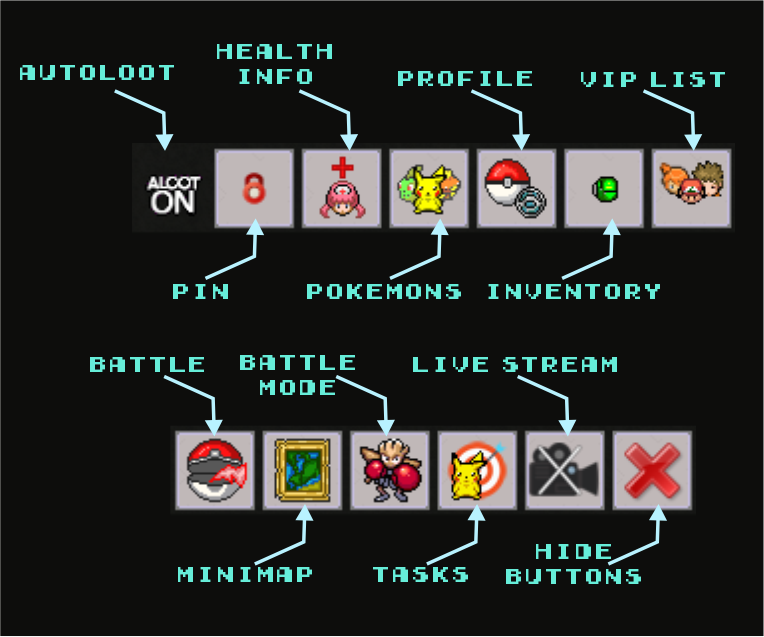
- Autoloot: Left-click to activate and deactivate automatic looting of items. Right-click to access autoloot depot and manage the items within
- PIN: Manage your personal identification number for account security
- Health Information: Toggles on/off the Player and Pokemon health and experience information
- Pokemons: Toggles on/off the display of your current Pokemon party modal
- Profile: Toggles on/off the display of your profile information
- Inventory: Toggles on/off the display of your inventory
- VIP List: Toggles on/off the display of your VIP list
- Battle: Toggles on/off the list of current wild Pokemon, Players, and NPCs nearby
- Minimap: Toggles on/off the display of the minimap
- Battle Mode: Opens a modal that you can use to contol your active pokemon in a similar way than you control your character
- Tasks: Toggles on/off the display of your current tasks
- Live Stream: Access the stream feature that allows you to stream your gameplay to other players
- Hide buttons: Hides the buttons from the right top menu
The display of some of the menu buttons is dependant on your quests and other in-game actions so, if you don't see a button, it might be locked or unavailable at your current progress.
4. Fishing rods and other "fishing" systems
You can start fishing on water at level 10. Open your fishing rods case (from the Inventory modal), select one of your available rods (right-click), and use it on water.
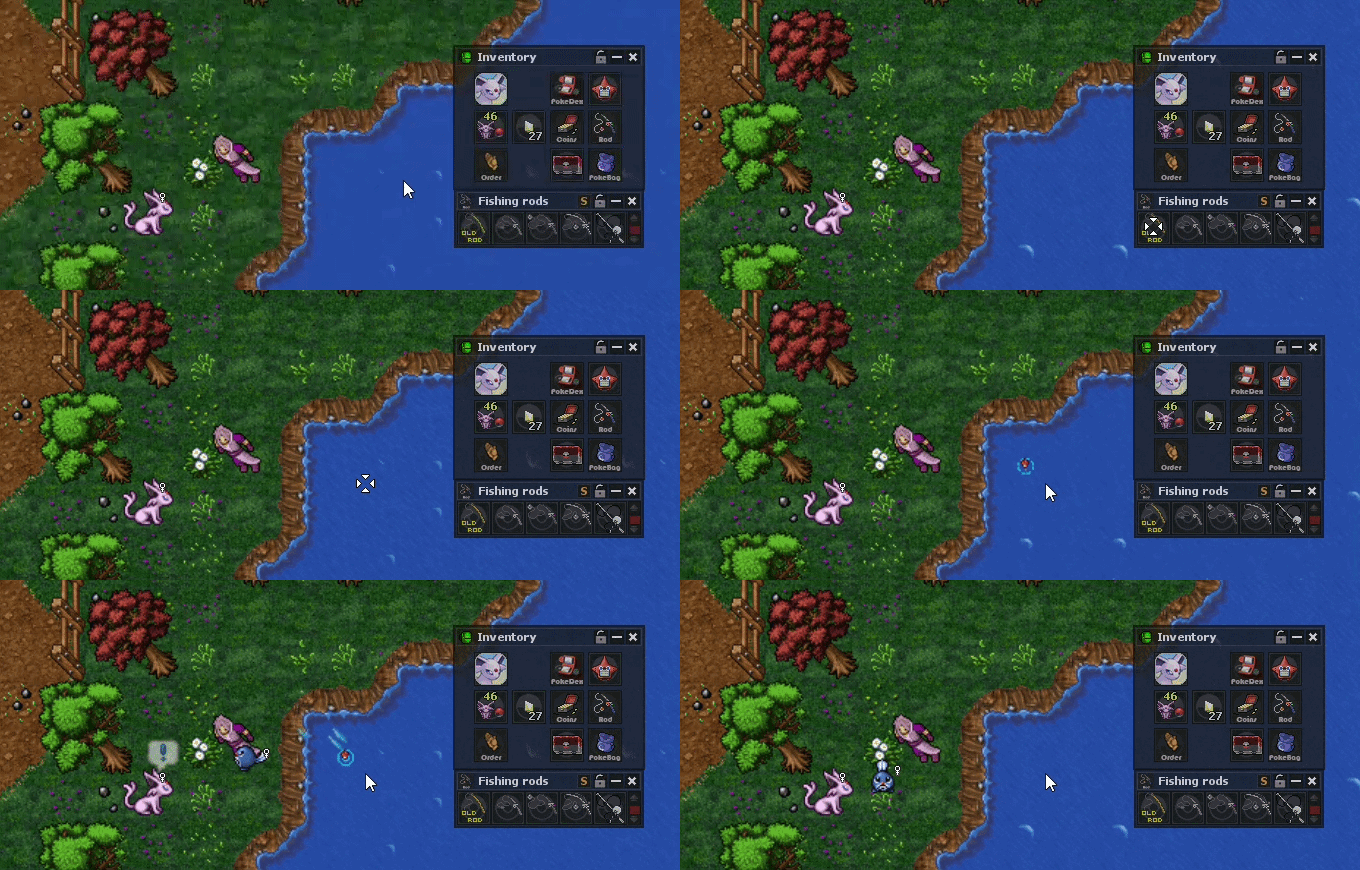
After a few seconds, one or more pokemon will spawn around you. The time it takes for the pokemon to spawn, the amount of pokemon and the type of pokemon that spawns depends on the rod you are using.
At the start, you only have the Old Rod. Better rods are unlocked through missions.
In addition to fishing rods, there are other "fishing" systems in the game that work in a similar way but with different themes. For example, the "Bug Catching" system allows you to spawn Pokemon using bug net, "Lava fishing" allows you to spawn Pokemon from lava, "Ice fishing" allows you to spawn Pokemon from ice, and some more. Each of these systems has its own requirements and spawns different types of Pokemon.
5. Order
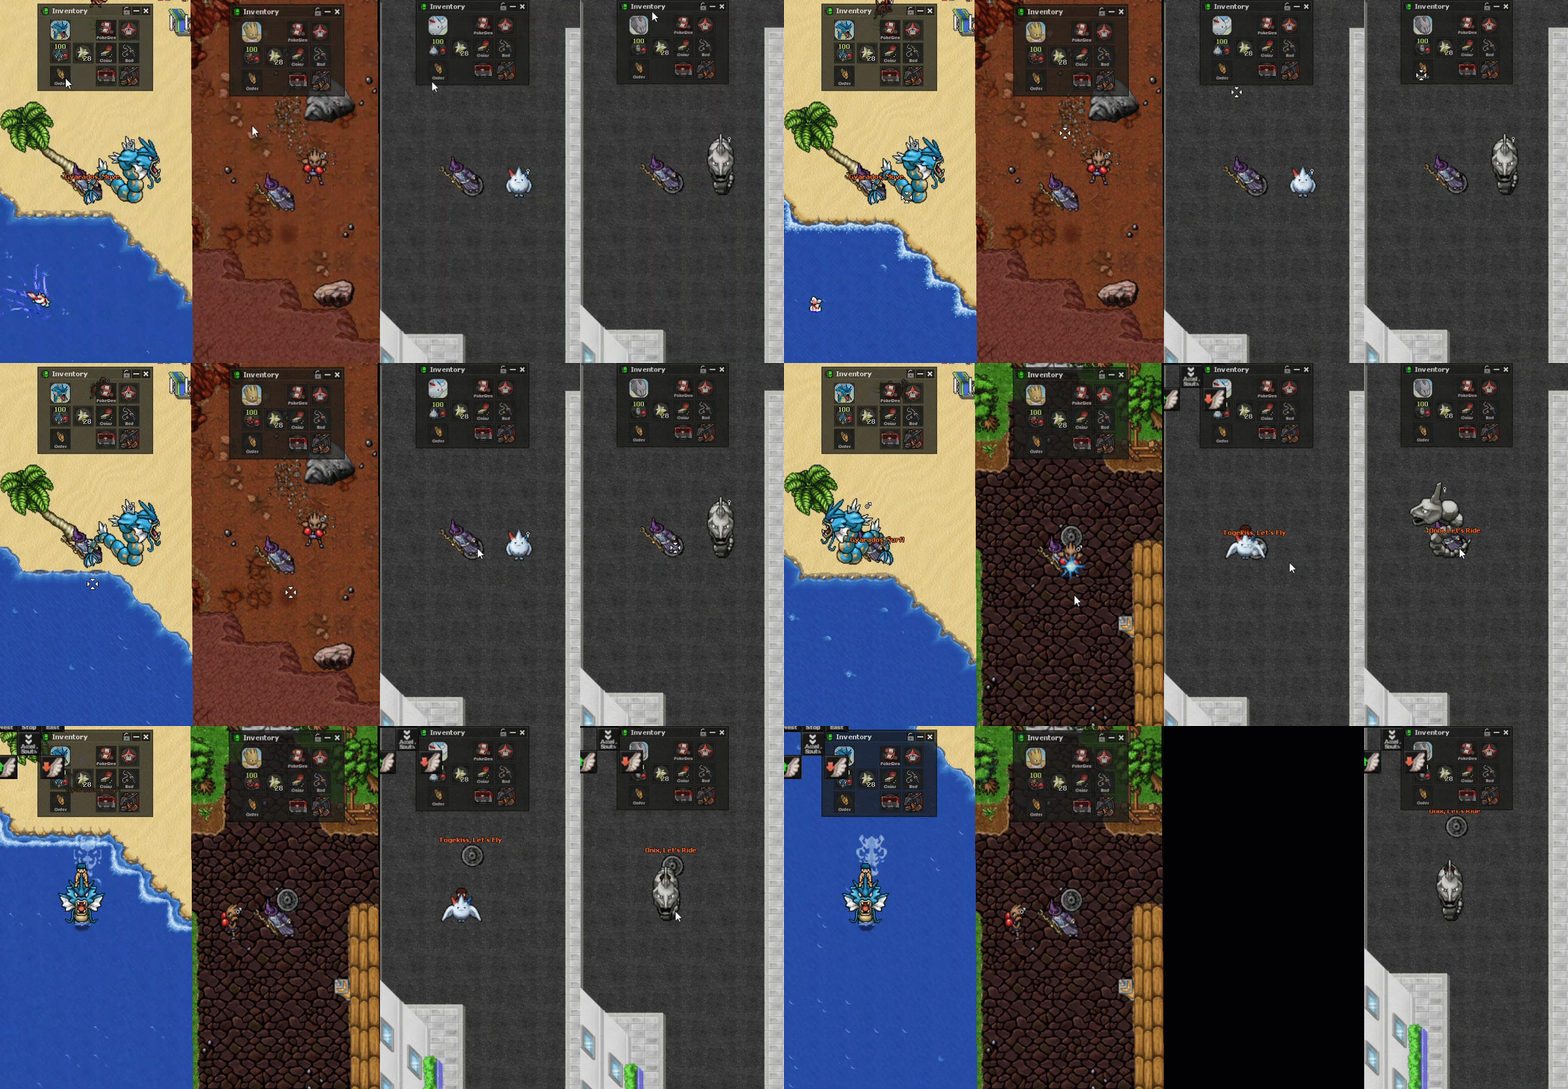
The order command can move your Pokemon around, order a Pokemon to use their available skills like: Ride, Surf, Fly, Dig, Cut, Blink, Sniff, and also works as rope in specific situations.
6. Pokedex
Use dex on Pokemon to register and track encounters
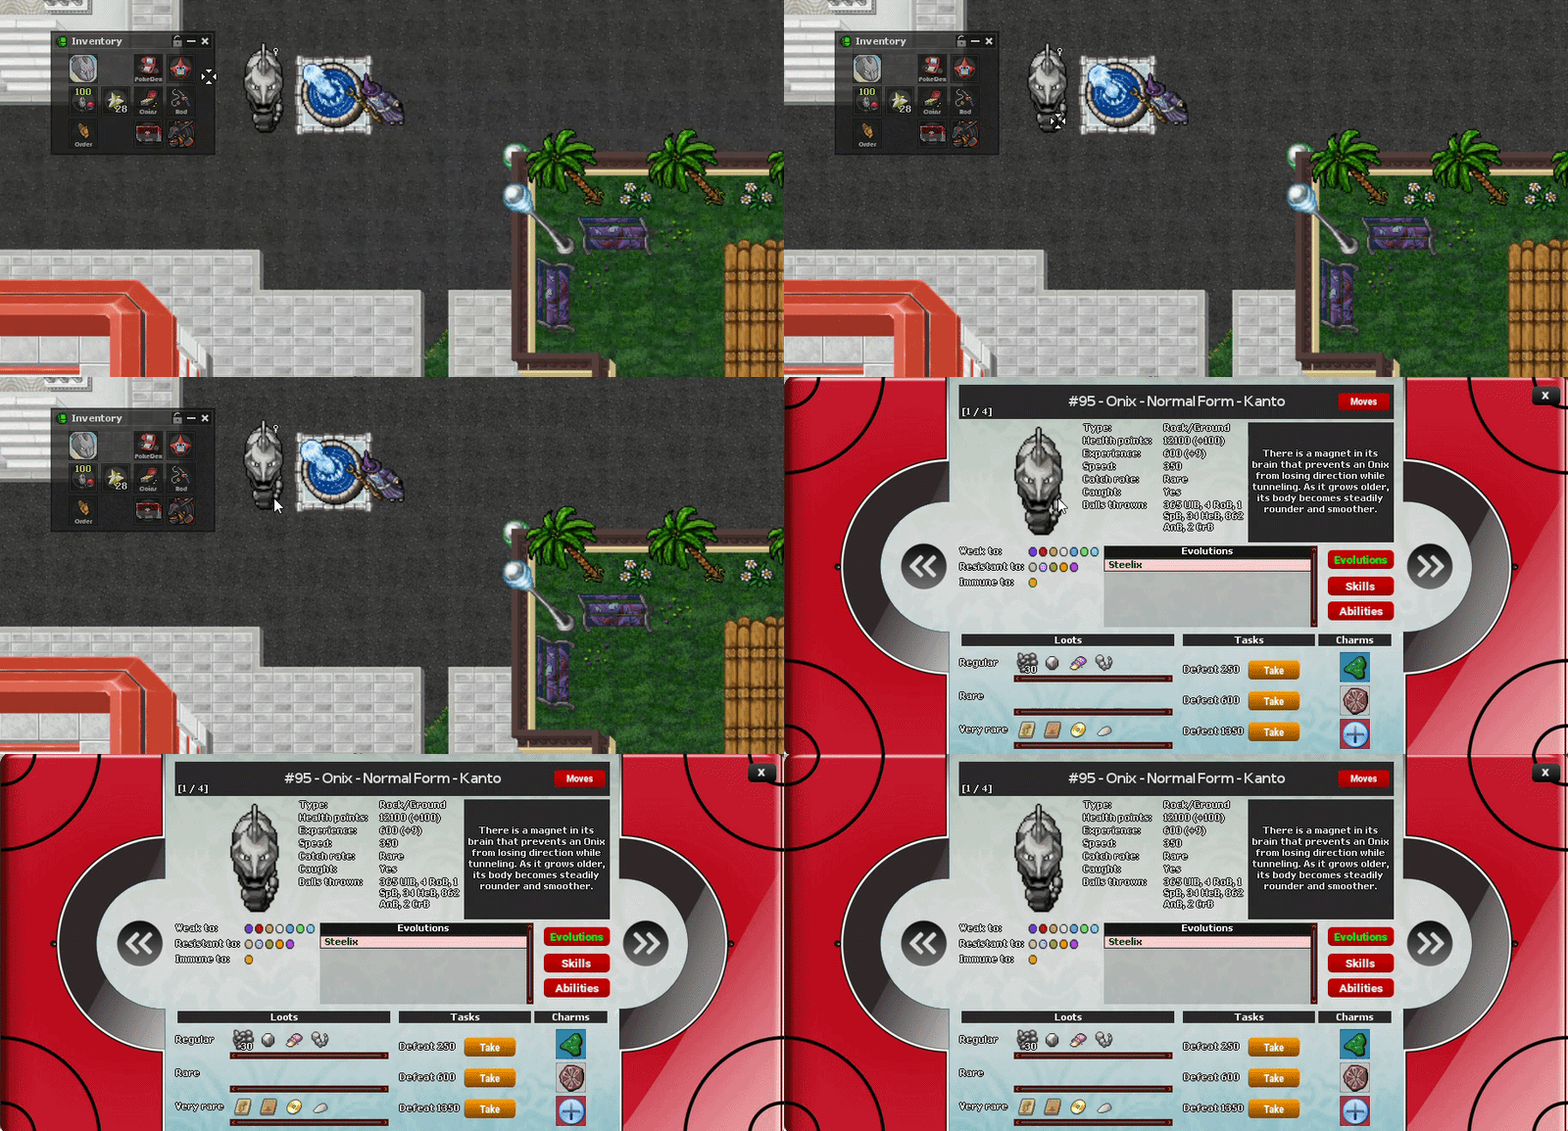
You can review your Pokedex progress any time later.
7. NPCs
You can interact with NPCs to receive quests, participate in battles, missions, and trades. NPCs are located all around the map, including inside Pokemon Centers (Nurse Joy), to interact with them, start with ""hi""
- Nurse Joy: Heals you and your Pokemon. Located inside Pokemon Centers
- Sr. Eko: Can change your residence city, character sex, sell premium status, and decrease the level of your Pokemon. Usually located next to PokeMarts
- Juanito: Buys loot and sells stuff like: Pokeballs, potions, and bags
- Patrick: Sells mail stuff like: Parcels, letters, and labels
lThere are many other Pokemon NPCs around the map that offer quests, battles, and trades. Explore the world and interact with them to discover all the game has to offer.
8. Outfits
Use the outfit option to customize your character appearance. Right-click on your character and select "Set Outfit" to open the outfit window:
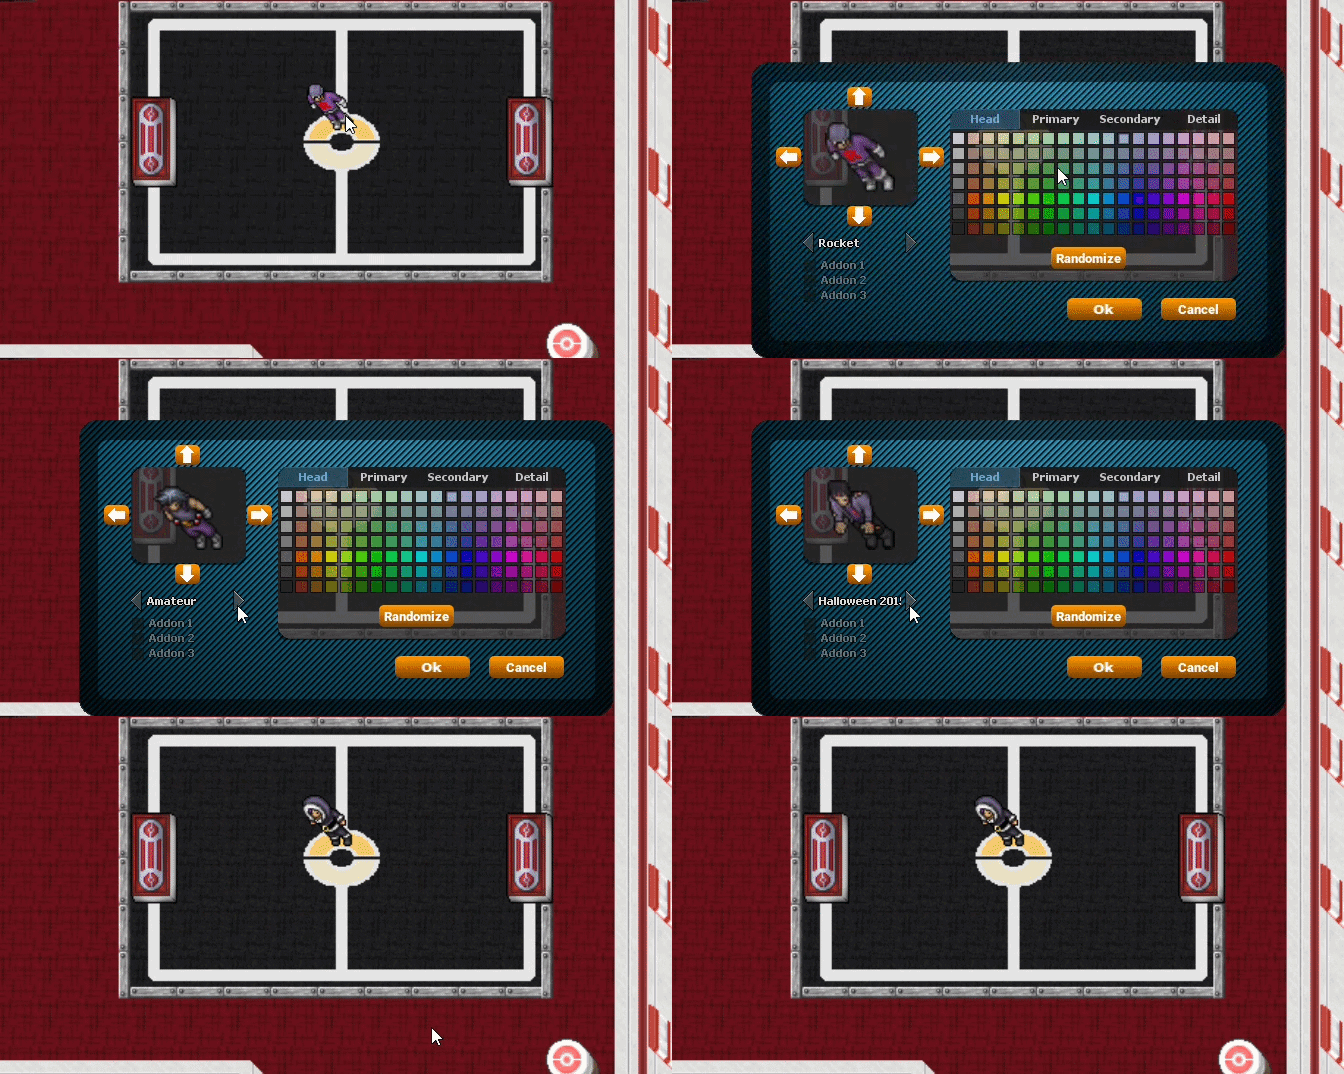
9. Chats
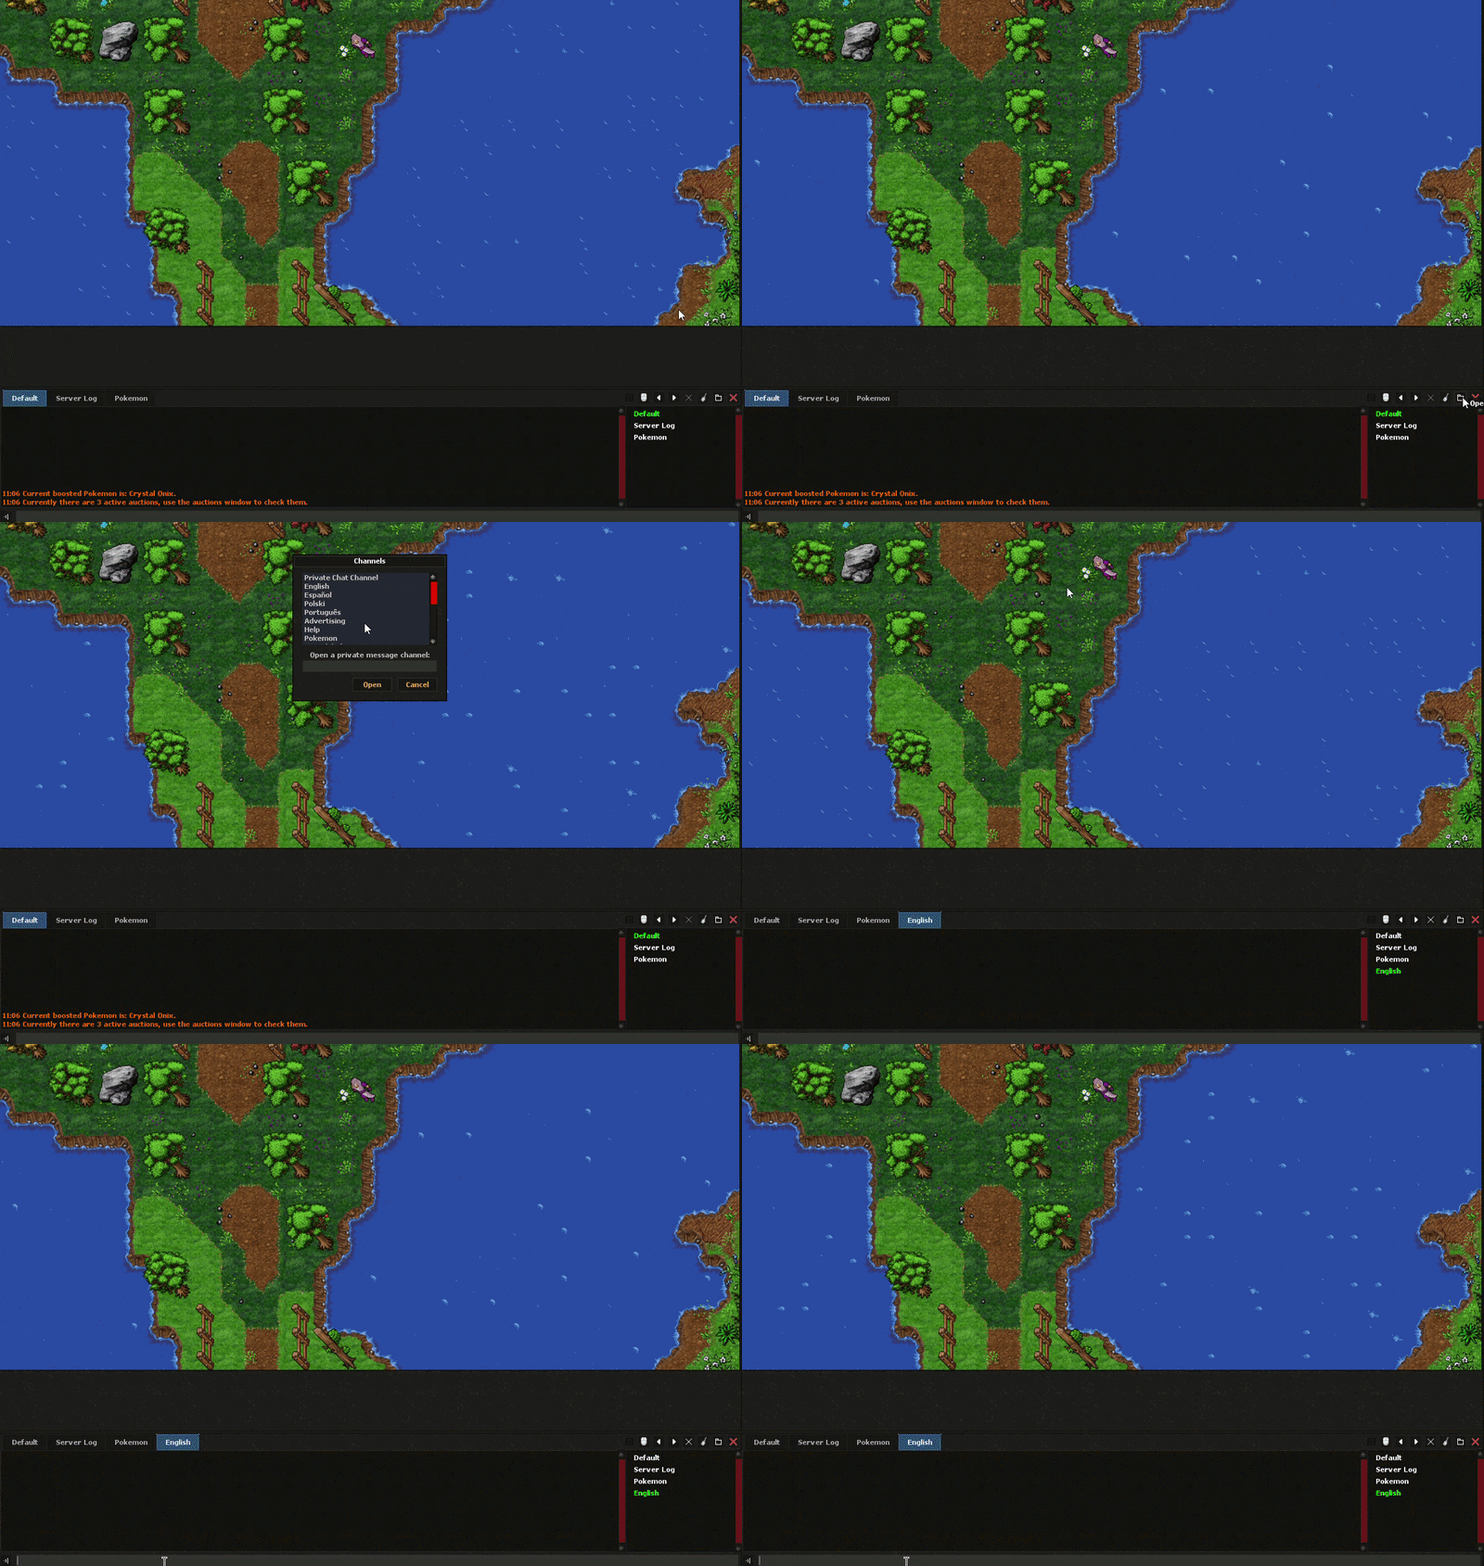
Open channels with Ctrl+O (or click the folder icon on the lower right side) to socialize, trade, or ask for help. You can also create private channels to chat with specific players.